Adobe’s Photoshop is such a ubiquitous application that it has become a verb; ‘Could you just Photoshop that?’ starts many a brief but, ‘don’t over do it,’ says no one, ever…
If there is ever a radio show called ‘Desert Island Apps’, Photoshop is the one we would choose to save from the waves at the end of the show.
Photoshop is a deeply lovely piece of software and what you can do with it still takes our breath away despite having worked in it since its very first incarnation in 1988. But if you are retouching a photo which you want to remain a photo, proceed with caution. It is very easy to ‘over-shop’.
Many people turn off their intuition when they turn on Photoshop
In this article, we are looking at the problem of when retouching degrades the plausibility of a photo. Of course, Photoshop can be used to create the most extraordinary works of art but by far and away, its most common usage is to change a photo without the photo looking changed.
The human eye is very sensitive and the brain that processes the images we see, very intuitive. We are accomplished at spotting patterns, tricks and anything that looks wrong – because that is how we survive. Unfortunately, many people turn off their intuition when they turn on Photoshop and turn a genuine photo into something clearly fake.
Super-soaker!
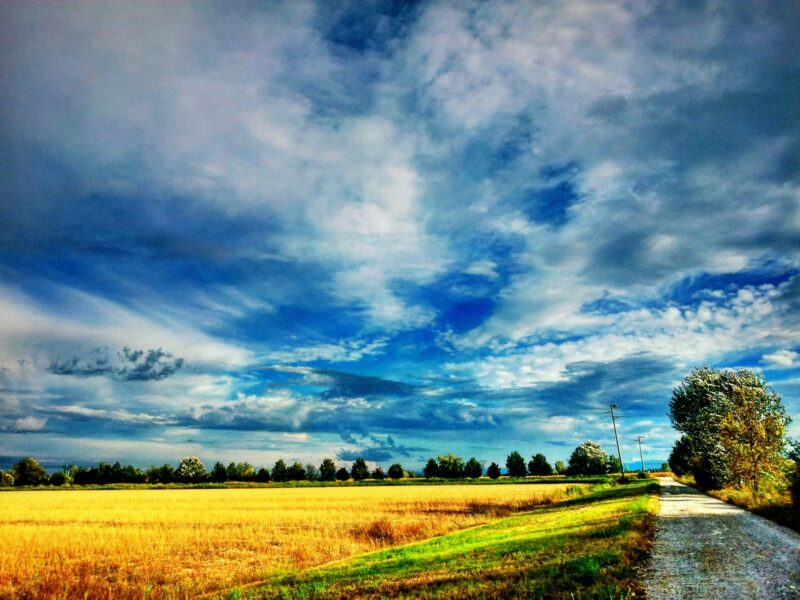
The most common Photoshop fail is the cranking up of the colour saturation and the contrast to unnatural levels. The simple slider tools are an artefact from the early days of photo retouching software.
Any retoucher worth their salt will talk about how to adjust colour saturation, balance or contrast using non-destructive techniques, with smart filters and masks which are much more nuanced than the simple sliders. Most importantly, the non-destructive tools allow you to go back and tweak them the next day when you’ve had a chance to NOT look at your project photo for 14 hours.
“Most modern-day cameras are very good at automatically assigning the correct saturation levels. You shouldn’t need to increase it but if you do, only by 2 to 8%”
Too much contrast and colour saturation remove the natural grading in the transitions between colours, and between the shades of lighting. Often seen in landscape photos, over-shopping saturation causes weird colours; this fail is very easy to spot because it just looks wrong.
Similarly, winding the contrast up forces the mid-tones towards the white or black ends of the spectrum. The loss of the mid-tones causes the ‘ink drawing’ look. The forced contrast also looks unnatural if the photo clearly has no strong light source. Strong brightness and deep darkness, in a photo which has no shadows and highlights, looks unnatural.
Focus on the detail
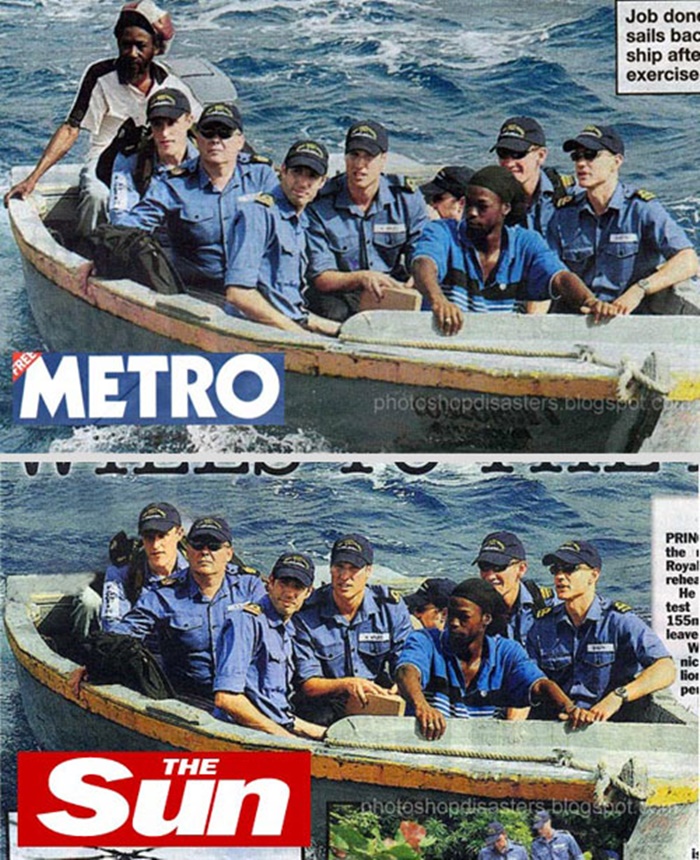
Preparing images for professional publication often involves rather more radical changes to the content. While we can all see the giveaways in the sculptured abs and pinched waists in bathroom selfies, equally unconvincing retouches appear on the front covers of the big titles. When you are messing with reality, you need to pay very close attention to the details of what you working on to make sure the image still looks real when you are finished.
Don’t focus on the detail
Equally, though, don’t focus on the detail so much you forget to look at the bigger picture. Working intensely, in minute detail and zoomed-in on one area of an image can cause you to over-cook that part of the photo such that it looks ridiculous when you pull back and look at the whole picture.
Fresh eyes
When we are carrying out a lot of work on an image, it is good to leave it overnight, or even a day or two, and come back to it to see how it looks with fresh eyes. And it always helps to have another retoucher look at a photo and tell you what they can see in it.
Here are examples of photos that Graphic Violence collaborators have retouched where they describe the tactics they deployed to keep their Photoshop adulteration invisible:
Example: keep it real
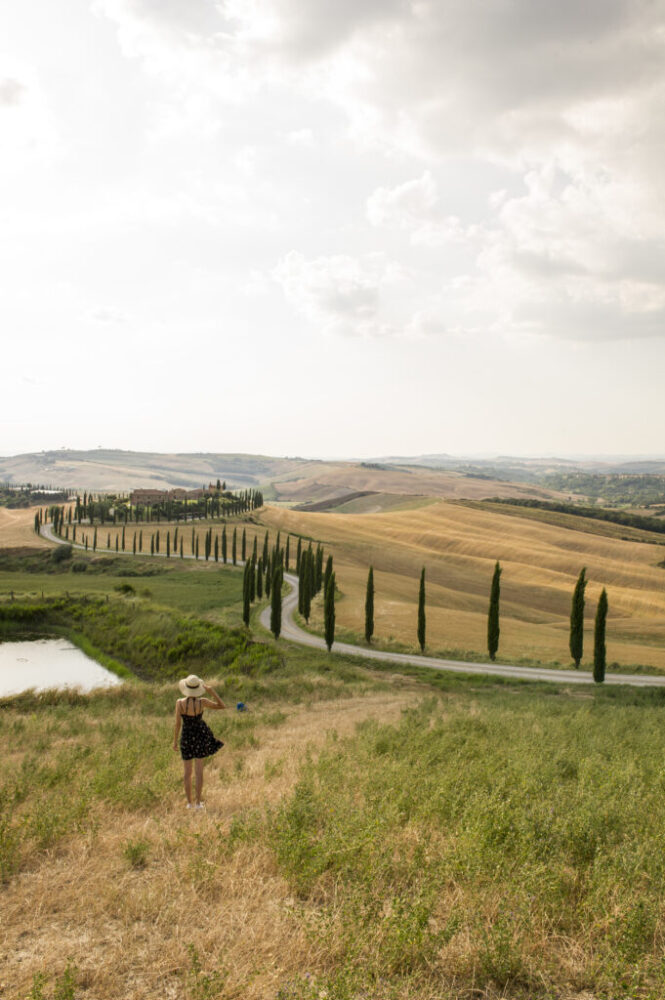
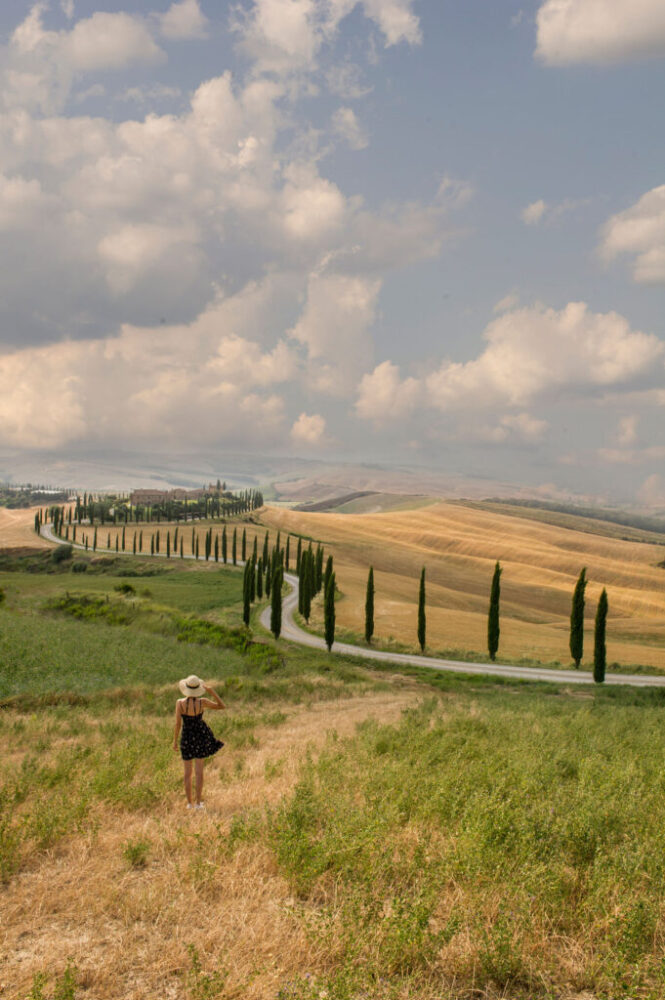
Award-winning travel photographer, Marina Spironetti, had got just the photo she wanted. Unfortunately, it was in two different frames. Tim Baggaley was recruited to combine them.
There were two aspects to this job; a sky needed putting in and an irrigation pool and a rucksack needed touching out. The sky came from another of Marina’s photos from the same shoot, thus reducing the risk of differing colour balances giving the game away. Gentle feathering always helps hide joins and in this case, placing the clouds low on the horizon makes what is actually Photoshop feathering and layer blending, look like atmospheric haziness.
The rucksack and the irrigation pool were both concealed with patches using samples from within the photo. When retouching this way, tweak and alter the content of each repeated patch to avoid obvious patterns appearing.
The completed montage was given a gentle colour wash with Photoshop’s photo filter tool to blend everything together. Now we have a blue sky, we can tweak up the brightness and saturation – just a tad – without it looking fake because the original photo had enough highlight and shadow in it.
Example: making fantasy real
An obviously fake photo can still be very convincing if it is Photoshopped correctly. Peter Mason shot and composed this montage of Andy Saunders’ Ford X2000 for Custom Car magazine.
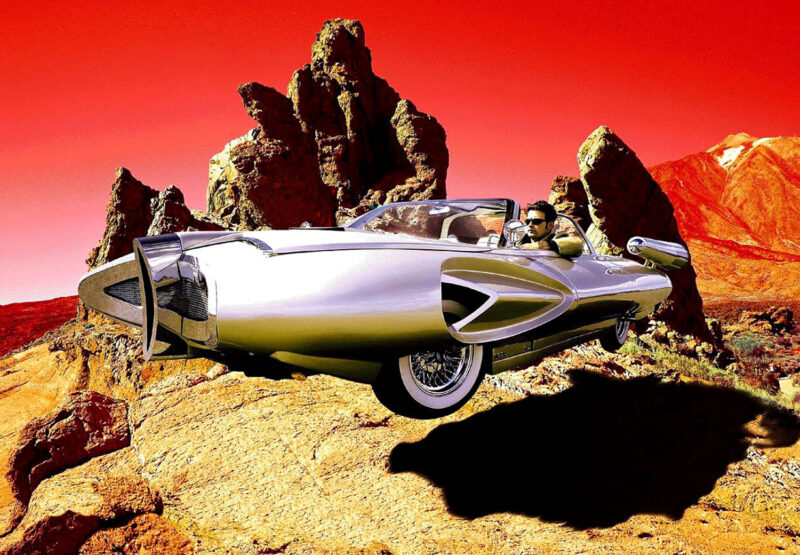
In planning this montage, lighting was crucial. The ‘alien landscape’ background photo was one I had taken of the volcano in Tenerife and I’d chosen this before shooting the car. Consequently, I knew how I needed the light to fall on the car. I photographed it in a wide, empty, car park so as to minimise the reflections in the bodywork which would have been tricky to touch out.
To generate a convincing shadow, I referred to un-retouched photos taken in the same sort of lighting conditions, to see how shadows really look. The hard edges and deep darkness are characteristic of strong, direct sunlight. Equally, I didn’t work too hard to create a shadow that matches the shape of the car. On that lumpy rock and grass, a wandering blob makes sense to our eyes. Don’t work in isolation on the photo creating what you think makes sense, have plenty of real-life photos on your desk as references.
Example: turn back time
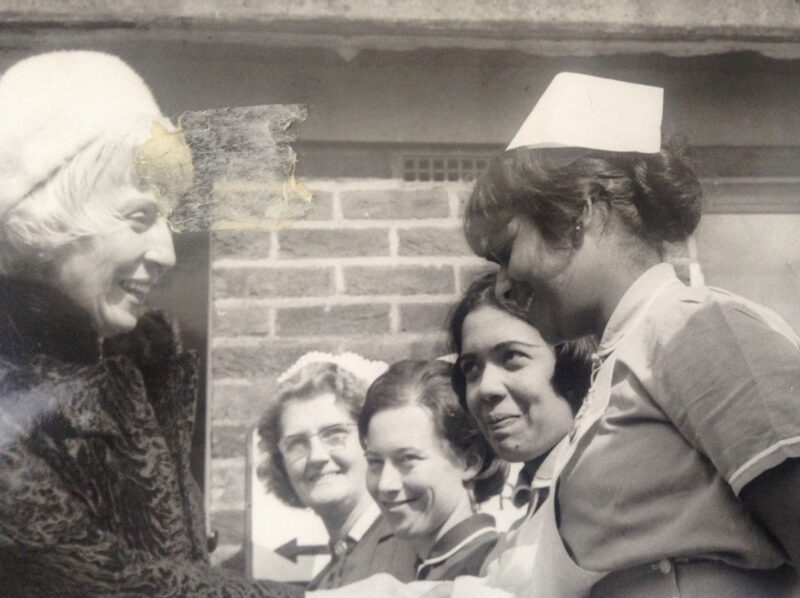
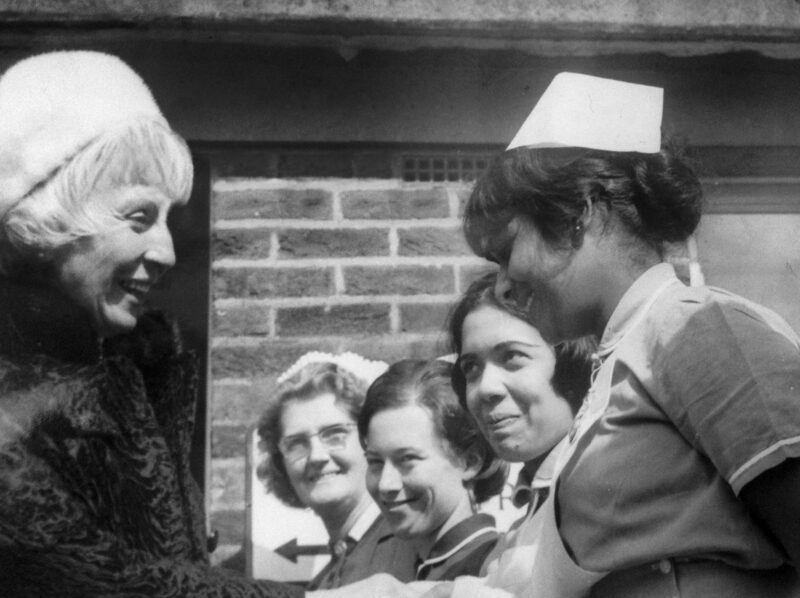
Photoshop can be used to great effect to reverse the effects of wear and tear on old photos. Tim Baggaley restored this photo for Nursing Standard magazine.
The starting point was not the original photo with a piece of masking tape on it, but a digital scan of the old photo. The original was quite underexposed and or faded with time, except around two nurses on the right. Two particular retouches were needed on this job. First, the lighting needed to be balanced and second, the tape needed touching out. The nurse second from the right served as the baseline for a more natural range of light and shadow, which I then applied to the whole photo. I isolated and separated the two nurses on the right and then adjusted the remainder of the photo to match.
Touching out the masking tape meant sampling and patching. The danger is that the patches give themselves away with obvious repetition of content. Look very closely at the blonde woman’s hair and you might be able to see a touch of mirrored repetition. I think, though, this is subtle enough you can see it only if it is pointed out.
The brickwork and building under the tape mark were reconstructed using patches sampled from other parts of the photo. As well as guarding against obvious repetition, I also needed to be sure the geometry of the bricks and mortar I patched in place made sense.
Example: go forth and multiply
The client wanted more bums on seats but could not provide them for the shoot. In post-production, Richard Baggaley was called upon to perform a miracle…
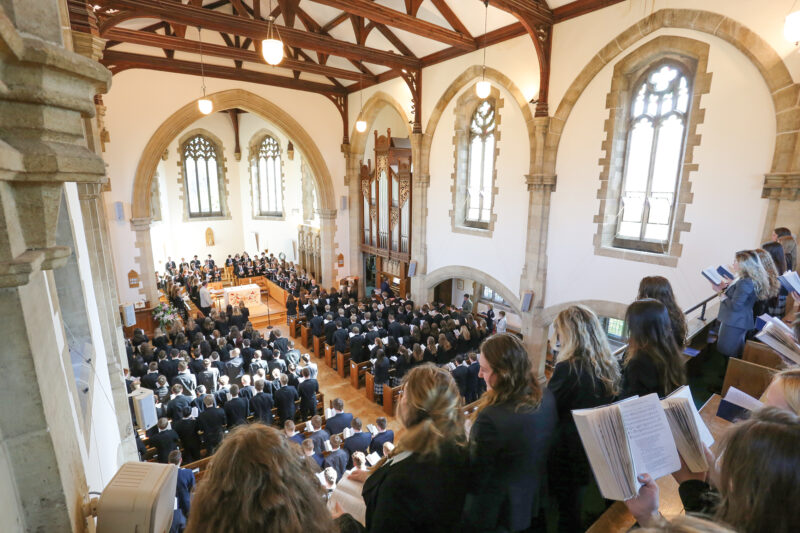
When photoshoots involve real people in real situations, it can be difficult to get the photo the client has in mind. So it was on this shoot, there simply weren’t as many people in the congregation as the client had imagined.
Obviously, I’d got to copy and paste some people into the empty seats. Because all the photos in this shoot featured the same people in the same places, I could not sample from other photos – all the content would come from the original.
The figures have the same orientation and stances, so in this respect, it was not too tricky. Because I was also using quite large patches, there was less risk of the localised ‘patterning’ which gives away so many Photoshop retouches. Nonetheless, I did spend a lot of time tweaking hairstyles and details of clothing and positioning, to reduce the danger of producing any obvious clones.
It is always the case when retouching that because you know what work you have done, it is obvious to you and so you think, to any observer. This isn’t true. I did not worry about actually putting people in the empty seats to the front and right of the aisle, I cloned in complete pews. In reality, even the people in this photo might not notice that there are now pews where there used to be seats. In Photoshop, reality needs to be convincing, but not necessarily true.
These four examples all entailed significant changes to the content of the image but done so as to conceal it. Photoshop is a very powerful tool but subtlety is key to hiding your retouching.
Tricks of the trade
- Plan your job: if you are shooting photos for the purpose of a montage, like our flying car, then storyboard your project. The closer you get to the photo you want at the start, the less work you need to do in Photoshop. If your job is on an existing photo, then plan what needs doing and how you will go about it before you wade in;
- Remember where you started: if you must change the file name of the original image, keep its original name within it. If you need to go back to the source photo it is a lot easier when you have the original file name;
- Watch for repetition: both the clone tool and the ‘smart’ fill tool will cause repetition in the patched areas. You will need to do some careful copy and paste with samples from other parts of the photo – or even from other photos, and
- It must make sense: even if the photo is an obvious montage, it must obey the laws of reality if you want it to look convincing. The direction and intensity of lighting gives us a great many cues about what is happening in a photo, and if the shadows and highlights don’t make sense, then the photo will look fake.
While there are plenty of opportunities to get things wrong in Photoshop, equally, there are multiple ways of getting it right. The collection of tools that Photoshop offers is immense. There are many different ways of achieving the same end result but whichever one you choose to use, the same considerations apply to make the finished image convincing.
Last but by no means least; keep all the working, even when you (think) the job is finished. You never know when you may have to go back to it…
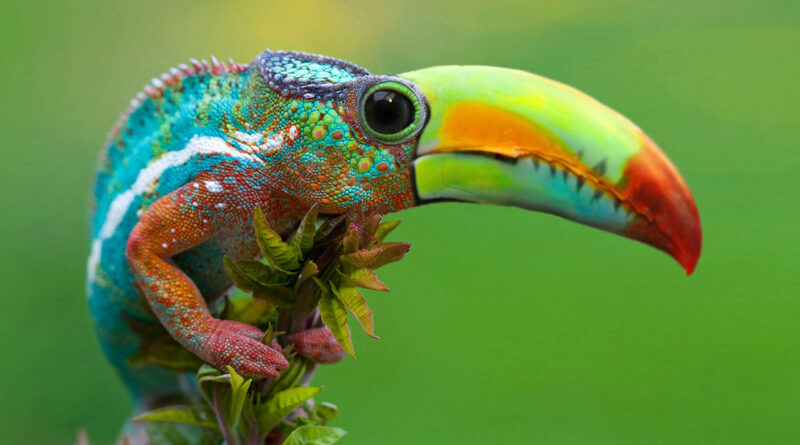
When you have Photoshop and too much time on your hands
Contributors
Read more
- Photoshop v1 – It looks positively prehistoric now but back in 1988 this was space age
- The 54 worst celebrity Photoshop fails of all time – Insider.com
- Internet Can’t Stop Laughing At Epic Photoshop Fails By World Famous Photographer – Can You Spot Them All? – Bored Panda
- Photoshop Tutorial: Five Easy Photo Retouching Tips and Trick – Photoshop Tutorials
- Best Photoshop Hybrid Creatures – A Pintrest round up of Photoshop animal mash-ups
- Andy Saunders Kustoms – See more of his amazing cars
- 20 Winners of The Greatest Photoshop Battles Ever – Sad and Useless

